This guide provides step-by-step instructions for adding a new property within the Forcefield Platform. It covers selecting a property type, adding services, and submitting the required information. If your account permissions allow, you can also book on-demand jobs once you create the property.
Step 1: Sign in to the Forcefield Platform
- Go to the Forcefield Platform
- Sign in using your credentials.
Don’t have an account? Create one here
Step 2: Access the “Add New Property” feature
- You can access the property form in two ways:
-
On the Request Jobs page, click Add New Property OR from the left-hand menu, expand the Organise section and click Property Mobilisation
Step 3: Fill in Property Details
-
If your login is associated with multiple accounts, select or enter the correct account.
-
Choose the property type and the type of checks: Internal or External.
Step 4: Configure Scheduled Services (if needed)
- You’ll be prompted to choose whether the property requires scheduled services.
- If no scheduled services are needed, tick No Scheduled Service (Keyholding & Alarm Response Only). If yes, select one or more services from the list to reveal the Scheduled Service Details section.
Include:
- Frequency: Daily, weekly, monthly, etc.
- Days: e.g., Monday to Friday, first week of the month
- Times: e.g., 4pm–7pm, daylight only
- Spacing: e.g., at least 1 hour between visits
Example: “3 patrols per night, every day, between 10pm and 5am, with a minimum 1 hour between each patrol.”
Then:
- Select a Start Date (and optional End Date)
- Indicate if the service should run on bank holidays
- Click Next
Step 5: Enter Property Details
Fill in the required fields:
- Property Name: Used in your contract (e.g., Forcefield HQ)
- Your Ref 1 and Your Ref 2: Optional fields for internal referencing (used on POs and invoices)
Set the property location using:
- 📍 Map Pin: Move it to mark the exact entrance
- 🌐 what3words: Enter the 3-word address (remove slashes)
- 🔢 Coordinates: Enter manually if known
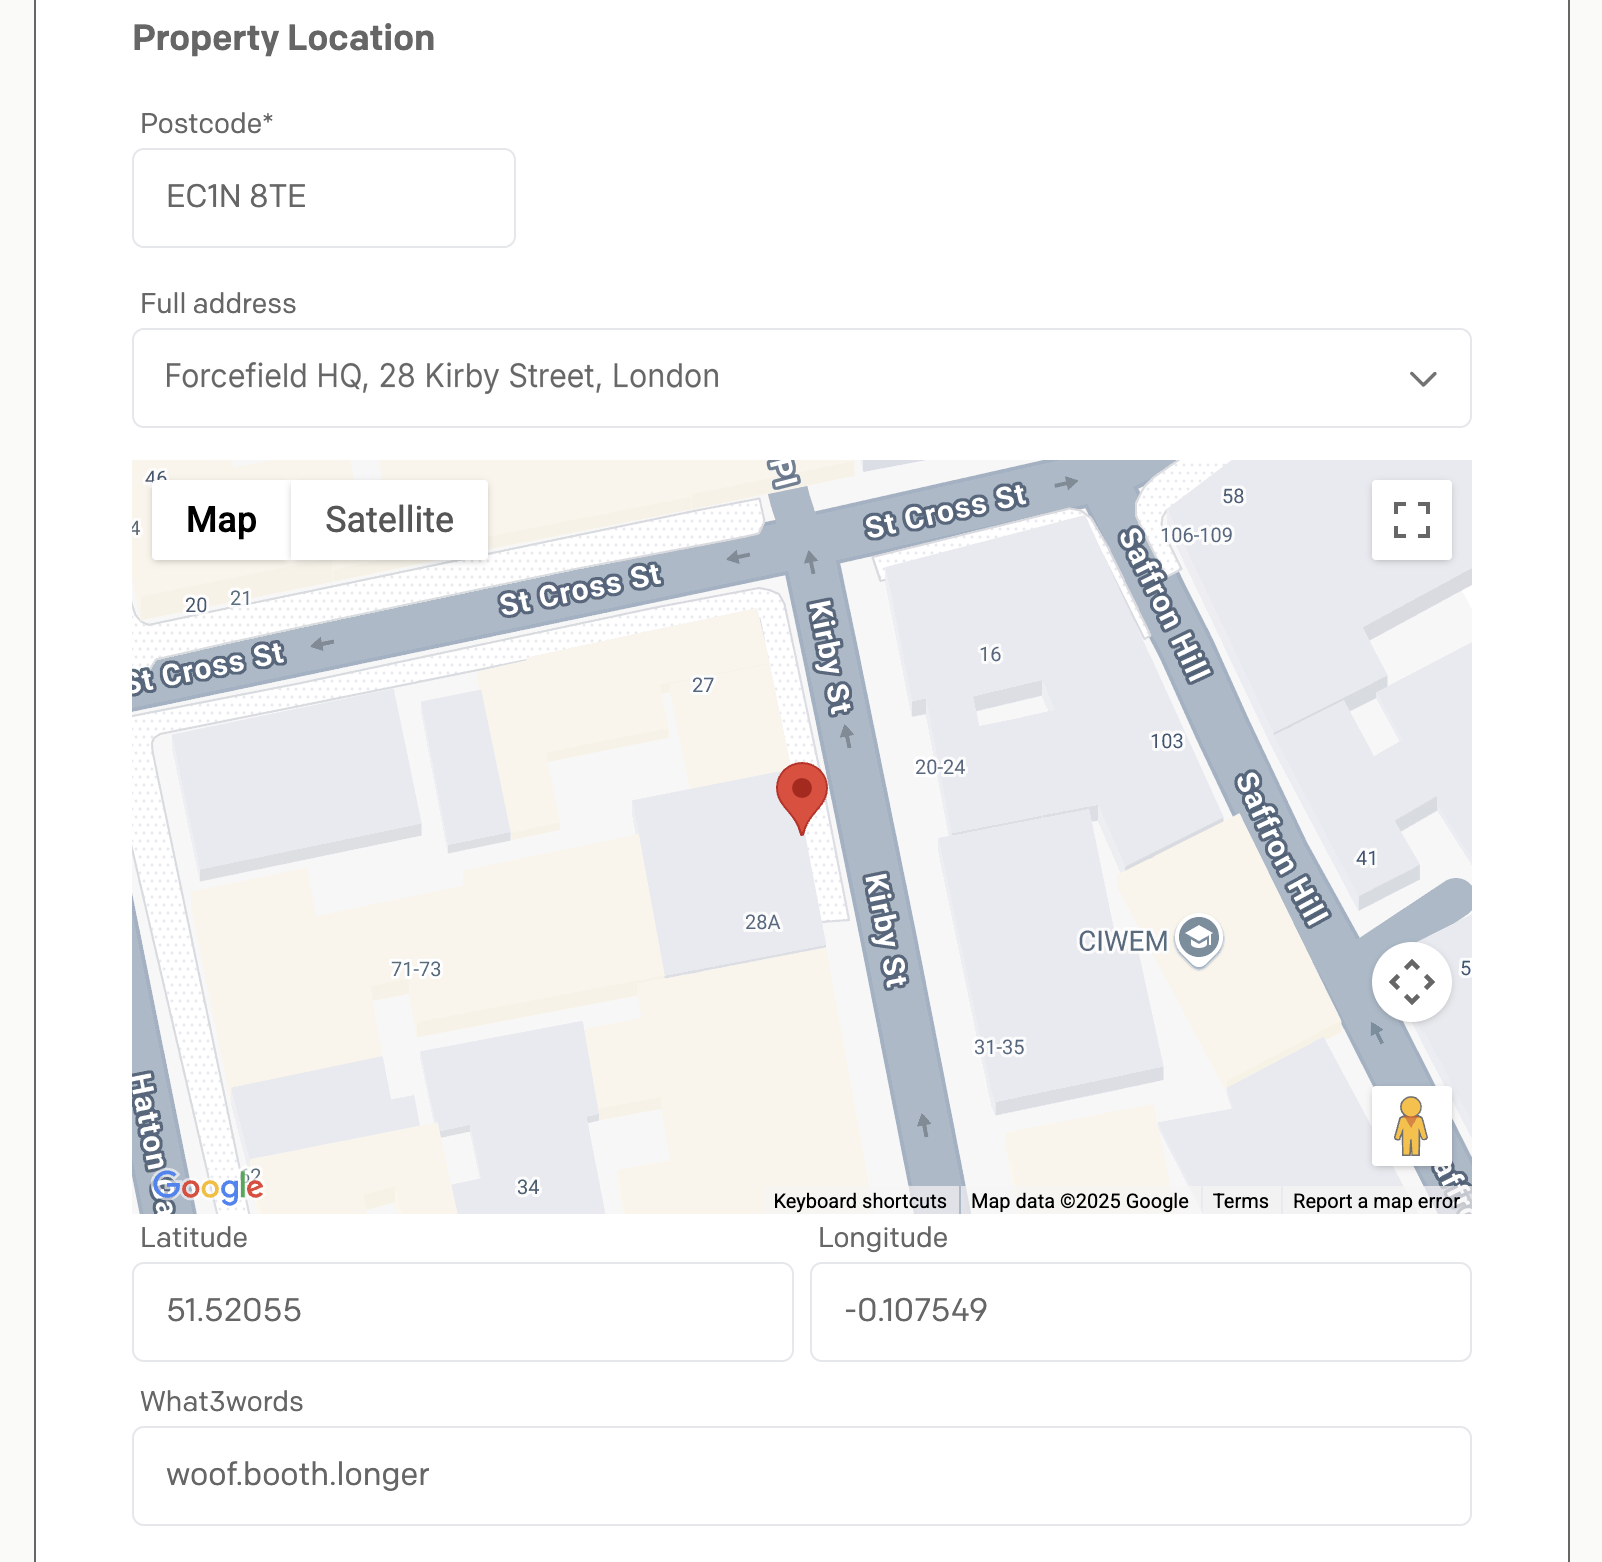
Step 6: Provide Assignment Instructions
Enter key information to assist during callouts:
- Entry and exit procedures
- Intruder alarm details such as access codes, alarm panel and details around the monitoring station provider
- Details around the property such as meter locations
Step 7: Add Contacts
- Emergency Contacts: Notified in the event of urgent issues or alarms
- Job Report Recipients: Will receive automated reports once jobs are completed
Final Step: Submit
- Once the form is fully completed, click Submit.
- The Mobilisation Team will begin the onboarding process and contact you if they need additional details or to schedule a site survey.